Tuesday, September 7, 2010

Tuesday, August 31, 2010

The can can

I always thought that canning and preserving was for the extreme Martha Stewart types (not that there's anything wrong with that, I love my girl, Martha!), grandmas and hippies. Also? I do not recommend that you Google botchulism. You'll never want to touch a can of beans again. Anywho...it seems to be a trend that has picked up quite a bit in the past few years (grandma was on to something!).

I've only ever made strawberry jam, but it was crazy good and absolutely worth the effort. 

after

Recently, I stumbled across the Sweet Preservation website and got the itch again. I've found that a lot of canning websites are buried deep within the ugliness of the internet, but this website super easy to navigate and purdy to boot. If you don't go for the recipes, at least check out the labels & crafts section. 

PW's cinnamon rolls and the death of a lens

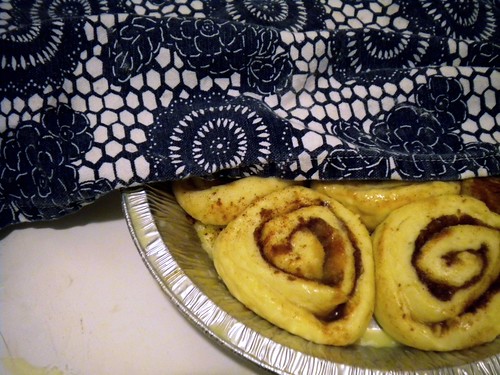
These rolls are pretty epic in the food blogosphere, so please excuse my crappy photos that do not do them justice. Remember this? Turns out not only did I break my lens, but a tiny microscopic pin that apparently holds together the little world inside my camera. So the Canon is in the shop, and I'm using our little point & shoot.

DSCN0778

DSCN0787

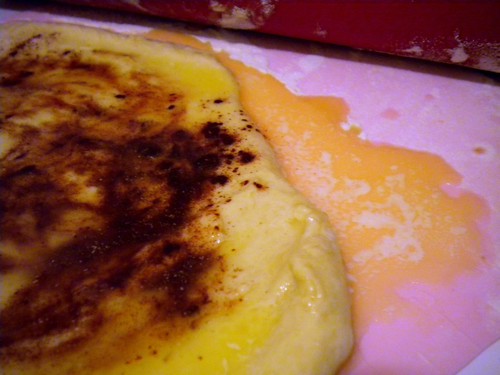
With the camera issues, I considered making this recipe and not sharing (bwah ha ha!), but thats just not fair. Because you see, there is butter. Lots of butter. Lots of butter that drips on the floor and pretty much lubes up every surface of your kitchen. Which is probably for the better, because it will make it that much easier to squeeze myself out of the room after I've devoured all these rolls.

DSCN0796


Saturday, August 28, 2010

Jamie Oliver's Pantry Collection

I really want this stuff. I could almost care less if it tastes good because it is so nice to look at!


I don't like mayo, but I think if I did, it would probably come from this jar.


Monday, August 16, 2010

Double Chocolate Cherry Scones

A few years ago I when I worked at Starbucks, one of my daily duties was to stock the pastry case. I liked getting assigned this task because it meant I was able to pick what went where and what was showcased. There was always a mix of special seasonal pastries and the usual treats, but scones always dominated. On any given day there were four to six different types of scones and despite their very processed and uniform appearance, they were delicious. Not in an "I've never had anything better" sort of way, but they were pretty good and I definitely had them for breakfast more than I'd like to admit.

IMG_2524

IMG_2531

Since then I've had a lot of delicious scones, but none that I've made myself. This recipe was exactly what I was hoping for: super chocolately and almost brownie-like, but still "dry" enough to be considered a scone. I added some dried cherries for a bit of tartness, but the big kicker was the cinnamon butter that went with it. Unfortunately someone dropped her camera, breaking her favorite lens before she could get a picture. Le sigh.


IMG_2534


Mini Double Chocolate Cherry Scones
(from here)

Ingredients
2 cups flour
1/2 cup unsweetened cocoa powder
1/3 cup packed light brown sugar
2 teaspoons baking powder
3/4 teaspoon baking soda
1/8 teaspoon salt
2 sticks (8 ounces) unsalted butter, 1 stick cut into pieces and 1 stick softened
1 cup semisweet chocolate chips (note: I did 1/2 c. chips and 1/2 cup chopped dried cherries)
1 large egg
3/4 cup buttermilk
2 tablespoons granulated sugar
1/4 cup confectioners’ sugar
1 teaspoon pure vanilla extract
1 teaspoon ground cinnamon


Directions
Preheat the oven to 400° and line a baking sheet with parchment paper. In a food processor, combine the flour, cocoa powder, brown sugar, baking powder, baking soda and salt. Add the pieces of butter and pulse until coarse crumbs form. Transfer to a large bowl and stir in the chocolate chips and dried cherries, if using.
In a small bowl, mix the egg with the buttermilk until just combined. Add to the dry ingredients and stir until the dough comes together.
Divide the dough into 2 equal parts and place on the prepared baking sheet. With lightly floured hands, shape each piece into a flat, round cake about 6 inches in diameter (I would recommend getting the flour prepped in a bowl before hand, as touching the dough will make your hands useless globs of chocolate). Using a sharp, straight-edged knife, cut each round into 8 equal wedges, leaving them in place. Sprinkle the tops with the granulated sugar and bake until firm in the center when lightly touched, 20 to 25 minutes. Transfer to a rack and let cool slightly before breaking into wedges.
In a small bowl, using a hand mixer or a fork, beat the softened butter with the confectioners’ sugar, vanilla and cinnamon until light and fluffy. Serve with the warm scones.

Tuesday, August 10, 2010

Granola Goodness

Hardly a day goes by that I don't consume granola. Usually it is found atop my yogurt and berries breakfast, and other times I just eat handfuls straight from the box. Thats right, a box. I never gave making granola much though until recently, but I'm always told how it's cheaper, tastier, etc. so I thought I'd give it a try.


IMG_2469

Originally, I'd wanted to go with the recipe everyone was raving about, but I was um....to lazy to leave the house and buy rice syrup. Also? At the time the only applesauce in my fridge was fruit punch flavored. Luckily, the awesomeness of making granola is that you can riff and experiment off a few basic principles, so I decided to find a few recipes and tweak them a bit.

End result? It is absolutely worth it. It's easy, cheap and I bet I'll never become bored experimenting with the millions of possibilities.


IMG_2488


Here are my edits: I really liked the cinnamon flavor, but I might hold off on adding that much again until the fall. In my mind, cinnamon is reserved for September-December. Also, instead of orange juice I used apple juice (again, too lazy to leave the house for ingredients). Lastly, I didn't want it to be too sugary so I cut back on the honey and and brown sugar ever-so-slightly.


Power Granola
(from CookingLight)


Ingredients
2 c. oats
1/4 c. chopped walnuts
1/4 c. chopped slivered almonds
2 t. ground cinnamon
1/3 c. orange juice 
1/4 c. honey
1/4 c. brown sugar
1 t. canola oil
1 t. vanilla extract
Cooking spray
1/3 c. dried fruit (I used cranberries)


Preparation
Preheat over to 300°

Combine first four ingredients in a medium bowl.

Combine orange juice, honey and brown sugar in a small saucepan and head over medium until sugar dissolves. Remove from heat and stir in oil and vanilla.

Pour wet mixture over oat mixture, stirring to coat. Spread into a thin layer on a jelly-roll pan coated with cooking spray. Bake at 300 for 10 minutes; stir well. Bake and additional 10-15 minutes (note: for crunchier granola, I went for 20-25 more minutes). Spoon into a bowl, stir in dried cranberries. Cool completely. 

Store in an airtight container at room temp.